Despite being fully owned by Lenovo, the Moto G4 Plus — thankfully — continues to run on a near-stock build of Android. Unlike many other handsets from other Chinese OEMs in the same price band, the Moto G4 Plus is the only handset to run on Marshmallow.
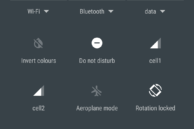
On the flip side, running a near-stock build of Android means that the Moto G4 Plus lacks many of the customisation options that are found on other Android devices in the same price range. One such feature that the Moto G4 Plus is the ability to customise the Quick Settings panel. A seemingly basic feature that is present in almost every other Android phone out there. While the Moto G4 Plus does not support Quick Settings customisation officially, you can still customise the panel on the handset via a hidden menu. Here’s how:
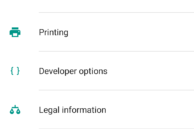
Step 1: On your Moto G4 Plus, expand the Quick Settings panel, and then tap and hold the Settings button. After holding the button for almost 10+ seconds, you should get a toast notification informing you that System UI tuner is now enabled on your handset.

Step 2: Now, head over to Settings -> System UI Tuner -> Quick Settings.
Step 3: Simply drag ‘n’ drop the tiles wherever you want to re-arrange them. To delete a quick tile, drag it down and throw it towards the trash can icon that you see. Similarly, to add a new tile, scroll down and tap the Add tile option.
Once you have made all the changes, simply press the back button to exit and save your changes. To reset the Quick Settings panel back to its original stage, tap the 3-dot overflow menu button on the top-right corner and select the Reset option.
While the steps above are for the Moto G4 Plus, they will also work on the Moto G4 and the Moto G3.
If you are facing any issues while following the steps above, drop in a comment and we will help you out.


